
![]()
Click HERE to Discover these 80 Keto-Friendly and Healthy Slow Cooker Recipes
Got a minute? Here are 10 different exercises for the most common types of pain. The best part: They only take one minute each!
Between work, errands and social obligations, even when we are in pain it is hard for most of us to fit in a massage or a long stretch session. Luckily, getting rid of uncomfortable pain doesn’t have to take hours.
We’ve put together the best one-minute mobility hacks to help with ten of the most common types of pain. From chest and back pain to calf and foot pain, we’ve got you covered. All you need is one-minute!
Chest Tightness
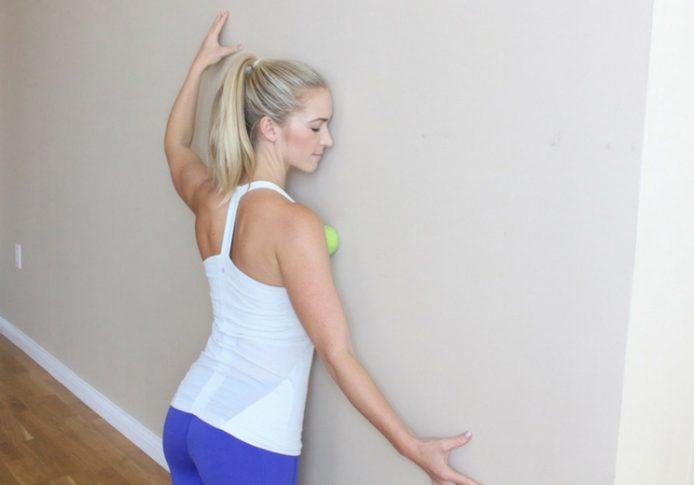
If you suffer from a tight chest and rounded shoulders, this one is for you. All you need is a tennis or lacrosse ball and a wall.
To begin, place the tennis or lacrosse ball on the wall.
Facing the wall, lean your body against the ball so that it rests on your chest right above your armpit. Apply pressure to the ball and notice if your chest feels tender. If so, hold the spot for 10 seconds.
Then, move the ball slowly around the area to see if you find any other tender spots. When you do, hold for 10 seconds and then move on. After you’ve been on one side for about 30 seconds, switch to the other side.
Hip Pain
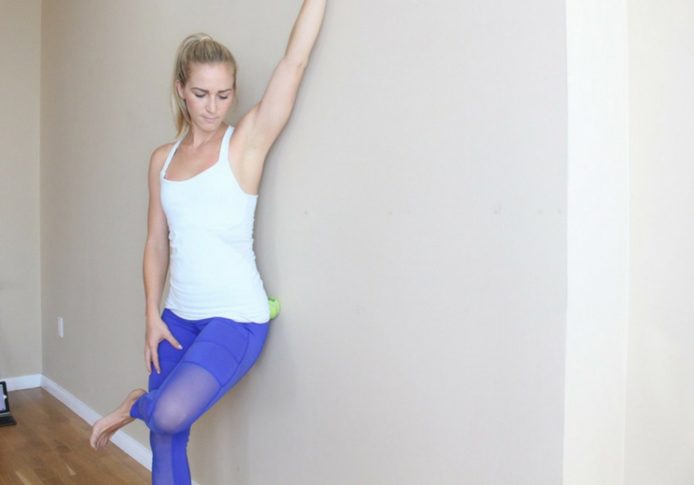
Suffering from pain due to tightness in your hips? Grab a tennis or lacrosse ball and find a wall to release your hips in just a minute.
Start standing next to a wall holding a tennis or lacrosse ball.
Cross your right ankle over your left thigh for a figure-4 position. Then, place the ball against the wall and position the outside of your right hip, where your Piriformis is, right against it.
Apply pressure against the ball, looking to see if you find a tight spot in your hip. If so, hold for 10 seconds. If not, move the ball around the area until you find a spot.
After 20 seconds on one leg, switch legs.
Sciatic Pain

If you suffer from sciatic pain, this classic yoga pose can quickly help to relieve it by stretching out the hips, glutes, and lower back.
Begin in a high plank position with your wrists lined up underneath your shoulders, your toes tucked under, and your knees lifted off the ground.
Pick up your right foot and draw your right shin towards your wrists. Line your right knee up behind your right wrist and try to line your right ankle up behind your left wrist. Flex your right foot to protect your knee joint.
Then, straighten your left leg back behind you and square your hips forward. Tuck your left toes under and keep your left leg active. Keep your chest lifted and feel the stretch through your hips. Hold for 30 seconds, then switch sides.
Achilles and Calf Pain
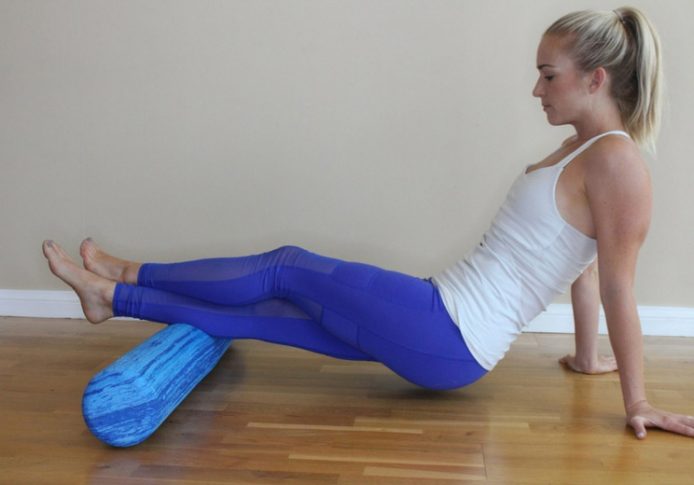
Using a foam roller for self massage is a cheap and easy way to release knots that cause pain in the joints and tendons.
Start by sitting down on the floor and placing a foam roller horizontally in front of you.
Place your right leg on the foam roller so that it is positioned right above your Achilles tendon. Cross your left ankle over your right and place your hands down by your sides.
Press into your palms to lift your hips off the ground and slowly roll forward over the foam roller so that it makes its way up your calf towards your knee. Pause for 10 seconds each time you find a tight spot and then move on, working up until you are right below the knee. Then, switch legs.
Upper Back Pain
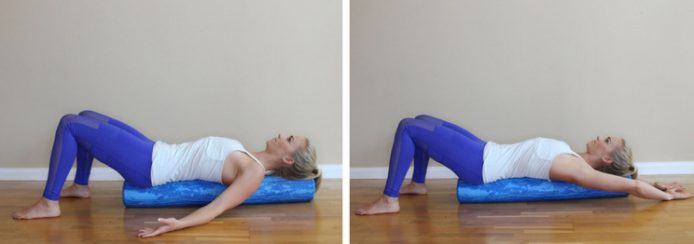
If your upper back hurts from too much sitting and slouching over, this foam rolling technique helps to release knots and to open up the chest and shoulders.
Begin by placing a foam roller on the floor. Then, lie down on the foam roller so that it is going vertically up and down your spine. Bend your knees to place your feet on the ground and make sure that the foam roller is supporting your head and your butt. Draw your belly in so that your lower back is pressing into the foam roller.
Take your arms down by your sides with your palms facing up. Inhale and reach your arms above your head, keeping your fingertips dragging across the floor the whole time, like a snow angel.
Pause for a moment to feel a stretch in the shoulders, then exhale and sweep the arms back down by your sides. Repeat for 15 repetitions.
Neck Pain
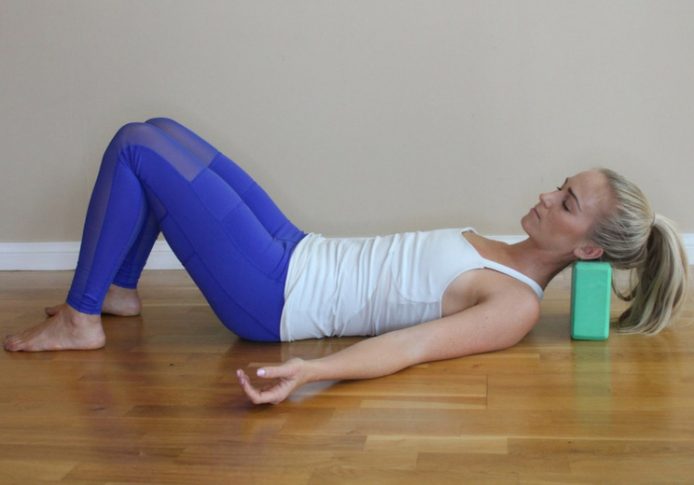
If you find yourself with a tight and painful neck, this simple self-massage technique will do the trick! Grab a yoga block and find a good place to lie down.
To begin, place a yoga block on the floor on the medium height.
Sit in front of the block a couple of feet and place your hands down behind you. Use your hands to lower yourself down onto your back. Then use your hands to adjust the block so that it rests right underneath the bottom of your skull. Bring your arms down by your sides. You should feel the edge of the block pressing into your upper trapezius right underneath your skull.
Rotate your head slowly from side to side letting the block massage the very top of your neck. When you find a spot that feels tender, stop and hold for 10 seconds, then continue slowly rocking side to side.
Shoulder Pain
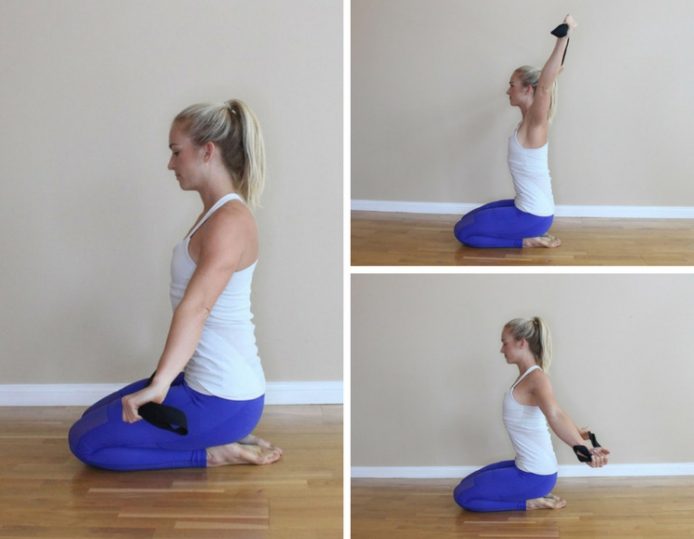
Tight shoulders lead to decreased mobility. Use this simple but effective stretch to increase your mobility in just a minute.
Start by kneeling down with your hips sitting back on your heels. Hold one end of a yoga strap or a long stick in each hand. Hold the strap or stick out in front of you, making sure that your hands are wide. The tighter your shoulders, the wider you want your hands to be.
Keep your arms straight the entire time. Inhale to reach both arms and the strap above your head, then exhale bring your arms and the strap all the way behind you to your lower back.
Inhale to lift the strap back above your head. Then, exhale to bring the strap back out in front of you. Continue going back and forward with your breath 10 times.
Watch this video – Yoga for Neck and Shoulder Relief – Yoga With Adriene
Lower Back Pain

Lower back pain can be extremely uncomfortable. Take just 1 minute with this classic yoga pose to find sweet relief.
Begin in a tabletop position on your hands and knees.
Take your knees out wide and bring your feet together to touch. Sit your hips back on your heels. Then, walk your hands out in front of you to lower your forehead down to the ground.
Keep walking your hands forward until your arms are straight, then let your forearms relax down. Close your eyes and feel your lower back and hips release. Hold for 1 minute.
Wrist Pain
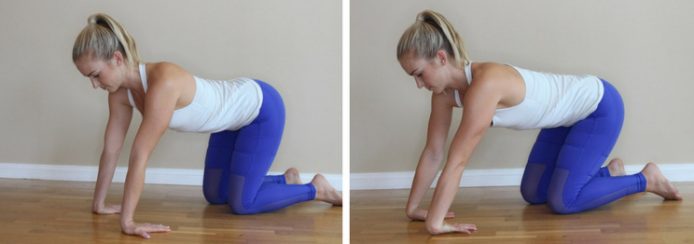
Whether you are suffering from carpal tunnel or a tweaked wrist, wrist pain can have a major affect on your daily life. This stretch combo works to release both the wrists and the forearms.
Start by kneeling down on the ground. Reach your arms out in front up you with your palms facing up. Bend your wrists that your palms are facing out and your fingertips are pointing towards the ground.
Then, lean forward and place your hands in that same position so that your fingertips are pointing towards your knees. Make sure your wrists are lined up underneath your shoulders.
Using your core to control the amount of pressure you’re putting on your wrists, start to sit your hips back towards your heels until you feel a stretch in the wrists. Take a few pulses forward and back and then hold for 20 seconds.
Then, lift your hands up and sit your hips back on your heels. Reach your arms out in front of you again, this time with the palms facing down. Bend your wrists so that the palms are facing you and your fingers point down towards the ground.
Then, lean forward and place the hands on the ground so that the tops of the hands are on the ground and your fingertips are pointing towards your knees. Sit your hips back towards your heels until you feel a stretch in the top of the wrists. Take a few gentle pulses and then hold for 20 seconds.
Foot Pain

This self-massage technique releases knots in the plantar fascia, leaving your feet feeling relaxed and pain free.
Begin by placing a tennis or lacrosse ball on the floor.
Standing over the ball, pick one foot up and place the foot on the ball so that it is resting beneath the arch of the foot.
Apply pressure down onto the ball and the slowly roll the foot forward and back over the ball. Each time you find a tender spot, hold for 10 seconds, then continue. After about 30 seconds, switch feet.
Written by Kelly Collins
Author Bio:
Kelly is a certified Personal Trainer with NASM, a Yoga Alliance Registered Yoga Teacher, and has her B.S. in Kinesiology from San Diego State University. She is co-owner of Roaming Yogi Adventures, a yoga and adventure-based retreat. She believes that having fun and well-rounded exercise is the key to maximizing strength, flexibility, and mental health.
A lot of people have gotten results from the Keto diet, and enjoyed the foods that it has to offer. However, many of the people who are following this diet have a hard time finding the recipes that they need, especially ones that are quick and easy to complete.
Fortunately, Kelsey Ale, noticed this problem, and decided to do something about it. She’s found that making recipes in a slow cooker gives you meals which are not only delicious, but also take very little time to make. Mostly you just put a few simple ingredients in the slow cooker, and let it do the rest.
To find out more, click on – Keto Slow Cooker Cookbook

No comments:
Post a Comment