Click HERE to Discover these 80 Keto-Friendly and Healthy Slow Cooker Recipes
18 Workouts for Strong and Sculpted Shoulders
Want to get toned upper arms? Try these workouts specifically designed for sculpted shoulders!
Sometimes doing the same old exercises can get boring, and we know how that can be. So, to spice things up a bit, we’ve created a list of 18 of the best shoulder exercises to build strength, tone and increase muscle, and increase both flexibility and stability through the shoulder girdle.
Add any of these exercises into your upper body routine to shake up your shoulder workout.

Standard Overhead Press – Stand with feet hip-distance apart and bring your weights and hands up to a goal post position with your palms facing forward and your elbows bent at 90 degrees.
Press the weights overhead without arching your back. Bend at your elbows to bring the elbows back into that 90-degree bend.
Can be performed with a barbell, dumbbells, kettlebells, and resistance bands.
Neutral-Grip Overhead Press – Stand with feet hip-distance apart and bring your weights up above your shoulders and in front of you with your palms facing each in and your elbows bent at 90 degrees. Press the weights overhead without arching your back.
Bend at your elbows to bring the elbows back into that 90-degree bend. The weights should always be slightly in front of you. Can be performed with a barbell, dumbbells, kettlebells, and resistance bands.
Arnold Press – This combines the neutral-grip and the standard overhead press into one exercise as was one of Arnold Schwarzenegger’s favorite exercises.
Start by standing with feet hip-distance apart, and bring your weights up above your shoulders and in front of you, with your palms towards you and your elbows bent at 90 degrees.
Use your shoulders to open the arms out into a goal post position, then press the arms overhead. Bend at your elbows and reverse the motion to come back down to your starting position, and repeat.
(View this video for a demonstration.)
Can be performed with dumbbells, kettlebells, and resistance bands.
Front Raise – Stand with feet hip-distance apart, holding dumbbells by your hips and your palms facing you.
Raise your arms up so that they are just about parallel to the floor with palms facing down, and lower back down to repeat.
Relax the neck and make sure to stand in good posture with shoulders pulled back (they may try to creep forward during the exercise!)

Lateral Raise – Stand with your feet hip-distance apart, holding dumbbells by your sides, palms facing in.
Making sure not to use the traps, and pulling your shoulders down, raise your arms out to the side so that your arms are parallel to the floor.
Lower your arms back to your sides and repeat.
Can be performed with dumbbells, kettlebells, a cable machine, and resistance bands.
Rear Deltoid Raise – Stand with your feet shoulder-width apart and holding your dumbbells with palms facing in. Hinge from your hips and lower your torso down towards the floor so that it is almost parallel to the floor.
With a very slight bend in the elbows, squeeze your shoulder blades together as you raise your arms out to the sides. Slowly and with control, lower the weights back down. Be sure to relax your traps and neck as much as possible.
Upright Row – Start by standing with feet hip-distance apart and holding weights with your palms facing in towards you. Starting from your elbows, pull the weights up to shoulder-height, thinking about squeezing the shoulder blades together in the back.
Your elbows should be in line with your shoulders and think about drawing your shoulders blade down your back to relax the muscles in your neck. Can be completed using dumbbells, a barbell, or resistance bands.
High Pull – Stand with feet hip-distance apart and hold your weight in front of your thighs, bending at your knees and hips so the weights hang just above your knees.
Explosively press your hips forward almost as if jumping and pull the weights up to shoulder level with elbows wide apart, as in an upright row. Can be performed with dumbbells, a barbell, or a kettlebell.
(See a demonstration here.)
Clean and Press – Stand with feet shoulder-width apart and hinge at your hips, keeping your back flat, as you lower down into a deadlift position, grabbing a barbell.
Start with the bar close by your shins, and your elbows pointing out to the side. As you begin to straighten the knees, simultaneously begin to pull the barbell, and press your hips forward, as you shrug and high-pull the bar.
As you extend through your hips, drive the bar up with momentum as your feet should come slightly off the ground. Bring yourself under the bar in a mini-squat, rotating the elbows below the bar, into a racked position across the chest. As you straighten the legs, continue the movement of the bar to press it overhead. Lower back down in the reverse fashion.
(View a full demonstration here.)
Cable Face Pull – Using the double rope handle in the cable machine, and with the pulley positioned at shoulder height, start sanding with arms extended straight in front of you.
Tighten your core as you engage the back of your shoulders to pull the rope towards your face, bringing the elbows just outside the ears. Squeeze the shoulder blades together, and slowly release the arms back straight to repeat.
(See this video for a demonstration.
Internal Rotation – Sit or stand next to a pull cable machine, with the pulley elbow-height. KEEP THE WEIGHT LIGHT, this exercise can do damage to your rotator cuff when too heavy. Position your elbow in by your waistline, with a 90-degree bend in your elbow.
Grab a single-hand cable handle, with your hand facing towards the pulley. This is your starting position. Internally rotate the arm to pull the handle in across your stomach, and then rotate back open.
(Watch a video example here.)
External Rotation – This is the same as the exercise above, only start with the arm reaching across your stomach as you keep your elbow in towards your waistline.
Externally rotate the arm to pull the cable out, away from the cable machine, and control to come back in. Remember to keep the weight light.
(See a video example here.)

Stability Ball Pike – Start in a full plank position with your feet on the stability ball and your shoulders over your hands. Use your abs, especially your lower abs, to lift your hips up to the ceiling, rolling the ball in towards you.
Use your shoulders to stabilize you and keep them directly over your hands the entire time. Slowly lower back down into a plank position and repeat.
Pike Push-Up – Start in a downward-facing dog position, with a wide hand position and your weight shifted more into your hands. Look up at your belly button to keep your neck in line with your spine. Bend the elbows out to the side and lower until the crown of your head just hovers above the ground, then press back up.
Handstand Push-Up – You can start in a handstand with your feet against a wall for support (recommended, if you’ve never done these before). Just as with the pike push-up, lower down by bending the elbows and then press up to straighten the arms.
It’s okay if you can only lower a few inches or so; you can work you way up to full range. If you want to get fancy and are strong enough, you could even do a freestanding handstand push-up (please only attempt this if you can do a handstand and hold it for a period of time).
(See a full demonstration and video here.)
Shoulder Taps – Starting in a full plank position, keep your hips as steady as possible as you reach your RIGHT hand to tap your LEFT shoulder. Place the RIGHT hand back into its starting position, and then tap the LEFT hand to the RIGHT shoulder. Continue alternating as fast as you can without wiggling the hips.
Lateral Plank Walk – Start in a full plank position with your hands directly under your shoulders and feet hip-distance apart. Slightly shift your weight into your left hand and leg as you step your RIGHT hand and foot out about six inches to the right.
Slightly shift over to the right side of your body as you step the LEFT hand and foot to come back underneath you. Continue stepping your hands and feet over to the right for 5-10 “steps,” and then step back to the LEFT.

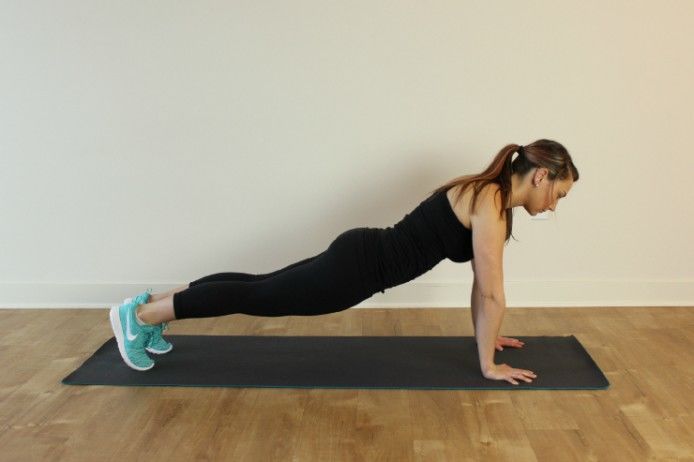
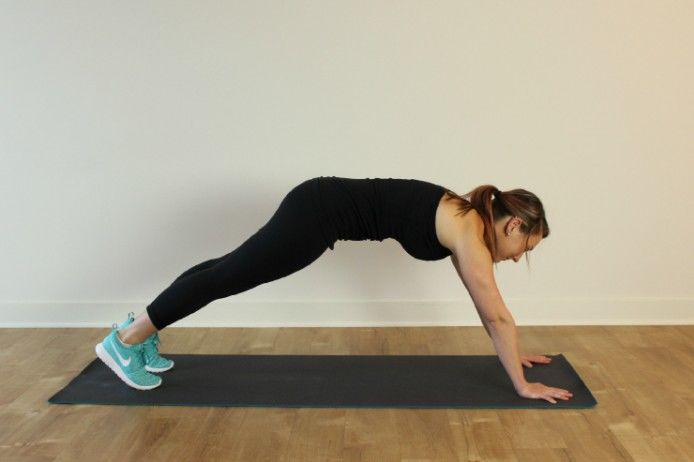
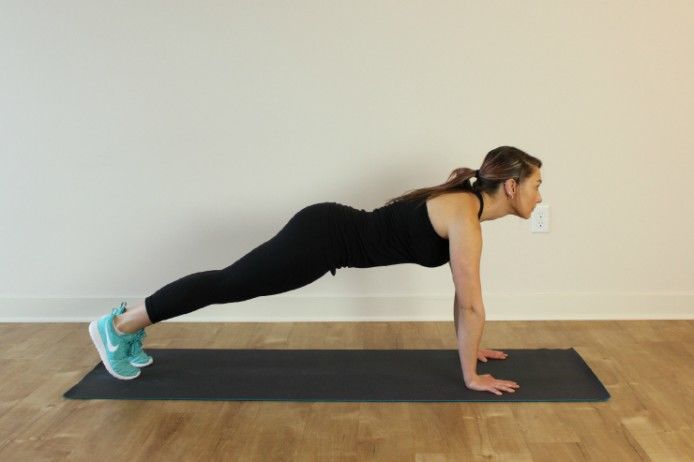
Inchworm – Start by standing at the end of your mat with your feet hip-distance apart. Bend forward to reach your hands to the mat in a forward fold, reaching your hands flat on the mat (your knees may bend slightly).
Walk your hands out about a foot at a time all the way out into a full plank position. Hold in the plank for a second or two, walk your hands all the way back into the forward fold, and repeat.
Watch this video – Toned Arms Workout | 15 min Upper Body Burn
Written by Deanna Dorman
Author Bio:
Deanna is an ACE® certified personal trainer, Balanced Body® Pilates instructor, and NASM® Fitness Nutrition Specialist. She is passionate about inspiring others to lead a healthier lifestyle through fun workouts and healthy food. When she’s not creating new workouts and recipes for her blog The Live Fit Girls she enjoys running with her two dogs and traveling.
A lot of people have gotten results from the Keto diet, and enjoyed the foods that it has to offer. However, many of the people who are following this diet have a hard time finding the recipes that they need, especially ones that are quick and easy to complete.
Fortunately, Kelsey Ale, noticed this problem, and decided to do something about it. She’s found that making recipes in a slow cooker gives you meals which are not only delicious, but also take very little time to make. Mostly you just put a few simple ingredients in the slow cooker, and let it do the rest.To find out more, click on – Keto Slow Cooker Cookbook